P
Pauli O
Here is short instructions how I get network sharing work with Windows 10 v1803.
(That's how I get all shares work with Windows 1803. I didn't use Homegroup so I start directly from step 2.)
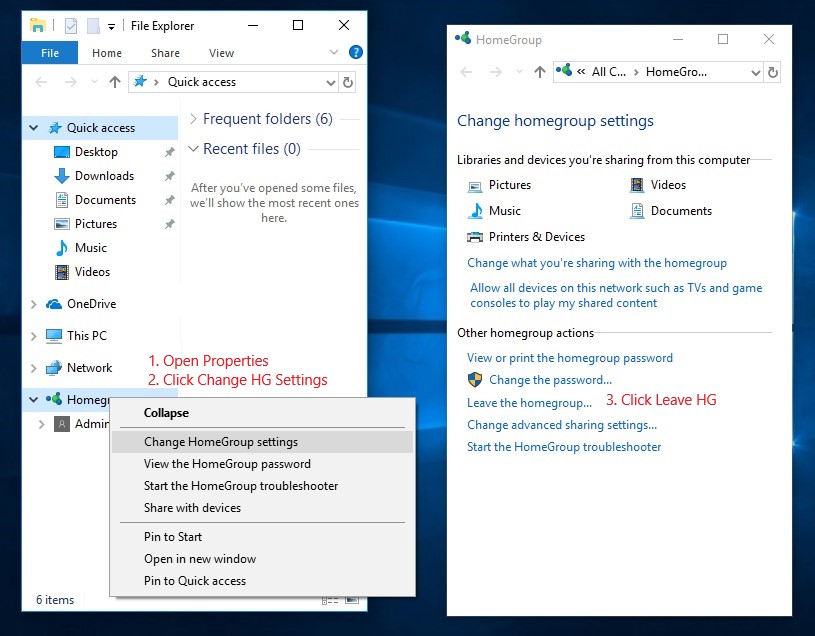
1. All PC's which are still using Windows 10 v1709 or older: Disconnect from non-existing Homegroup if you have used it.
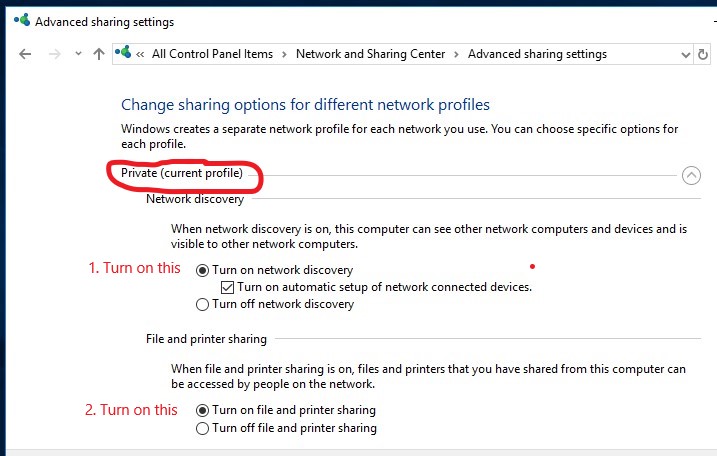
2. All PC's: Check Network profile and Network discovery and Share settings

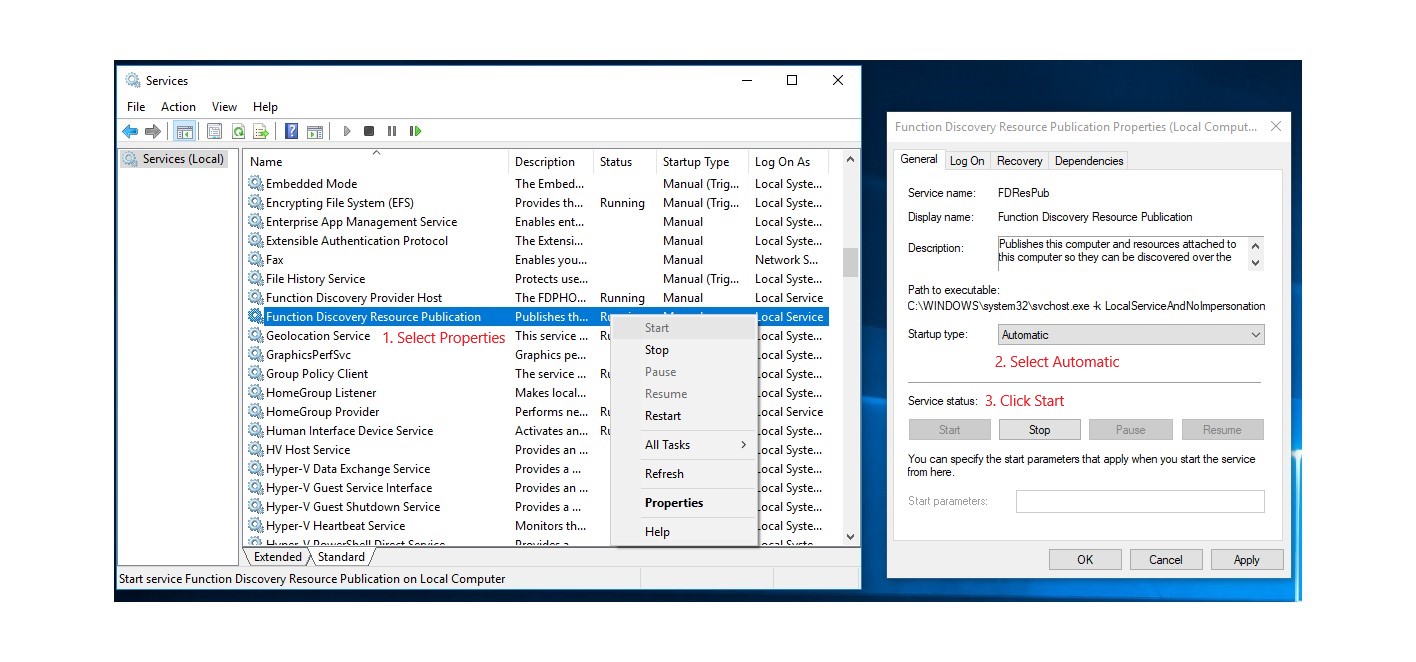
3. All PC's: Set Start type to Automatic and start following services that allow PC's to be visible on Network. (Reboot.)
- Function Discovery Resource Publication
- SSDP Discovery
- UPnP Device Host
4. All PC's: Recreate (4.1 + 4.2) or create new (4.2) share for C:\Users
4.1. Remove old shares
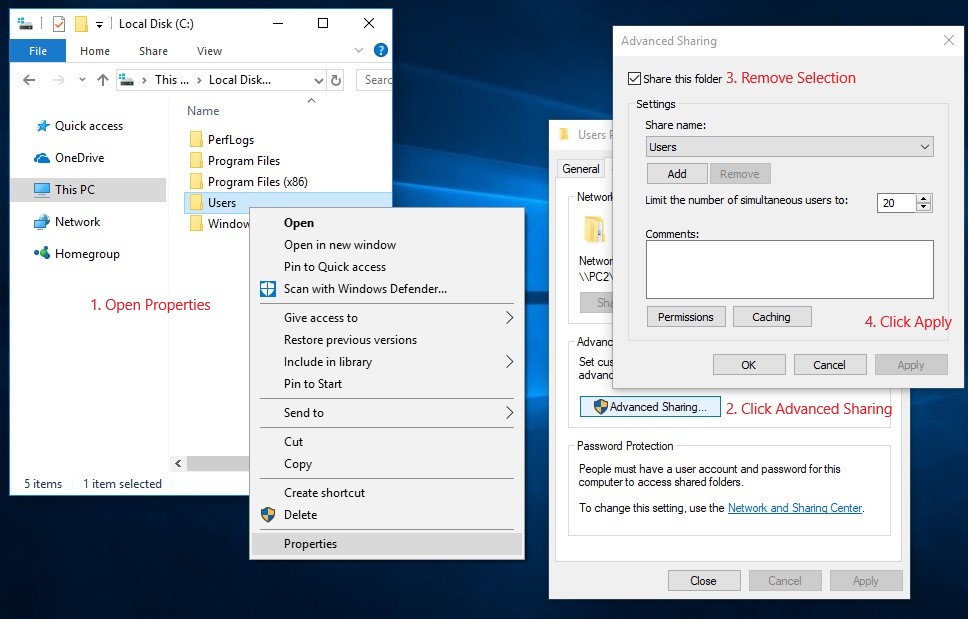
4.2. Create new share

Users folder is now shared and Network share path is: \\PCNAME\Users
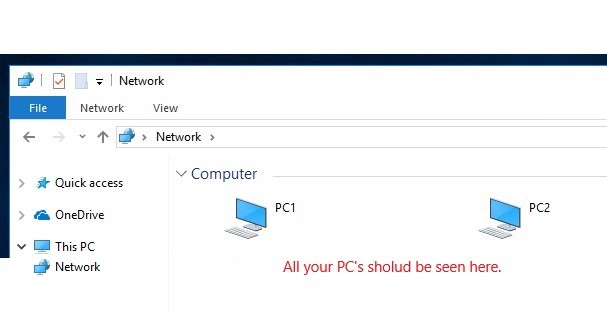
5. Now when click Network on File Explorer and all your PC's should be visible in Computer section
This should be cover the essentials to sharing your data over local network. This share is not limited to C:\Users folder, every folder can be handled like shown in steps 4.
There is some bug on Windows 10 1803 and because of that PC's can't always connect to each other by Name.
Work around to this is from prehistory of networking:
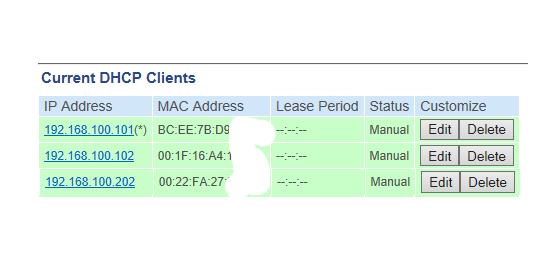
PC's need to use static IP-addresses on all PC's or router / modem DHCP-server settings must set to give predefined IP-addresses according to each PC's MAC-address this way PC's will get same IP-address every time it ask IP-address form router / modem DHCP-server.
Then add all PC's IP-addresses and Names to C:\Windows\System32\drivers\etc\hosts -table.
# localhost name resolution is handled within DNS itself.
# 127.0.0.1 localhost
# ::1 localhost
192.168.100.101 PC1 # Ethernet
192.168.100.102 PC2 # Ethernet
192.168.100.202 PC2 # Wi-Fi
Continue reading...
(That's how I get all shares work with Windows 1803. I didn't use Homegroup so I start directly from step 2.)
1. All PC's which are still using Windows 10 v1709 or older: Disconnect from non-existing Homegroup if you have used it.

2. All PC's: Check Network profile and Network discovery and Share settings


3. All PC's: Set Start type to Automatic and start following services that allow PC's to be visible on Network. (Reboot.)
- Function Discovery Resource Publication
- SSDP Discovery
- UPnP Device Host

4. All PC's: Recreate (4.1 + 4.2) or create new (4.2) share for C:\Users
4.1. Remove old shares

4.2. Create new share

Users folder is now shared and Network share path is: \\PCNAME\Users
5. Now when click Network on File Explorer and all your PC's should be visible in Computer section

This should be cover the essentials to sharing your data over local network. This share is not limited to C:\Users folder, every folder can be handled like shown in steps 4.
There is some bug on Windows 10 1803 and because of that PC's can't always connect to each other by Name.
Work around to this is from prehistory of networking:
PC's need to use static IP-addresses on all PC's or router / modem DHCP-server settings must set to give predefined IP-addresses according to each PC's MAC-address this way PC's will get same IP-address every time it ask IP-address form router / modem DHCP-server.

Then add all PC's IP-addresses and Names to C:\Windows\System32\drivers\etc\hosts -table.
# localhost name resolution is handled within DNS itself.
# 127.0.0.1 localhost
# ::1 localhost
192.168.100.101 PC1 # Ethernet
192.168.100.102 PC2 # Ethernet
192.168.100.202 PC2 # Wi-Fi
Continue reading...