Adding event handlers: Sounds, Dark Mode & Windowing (Part 2)
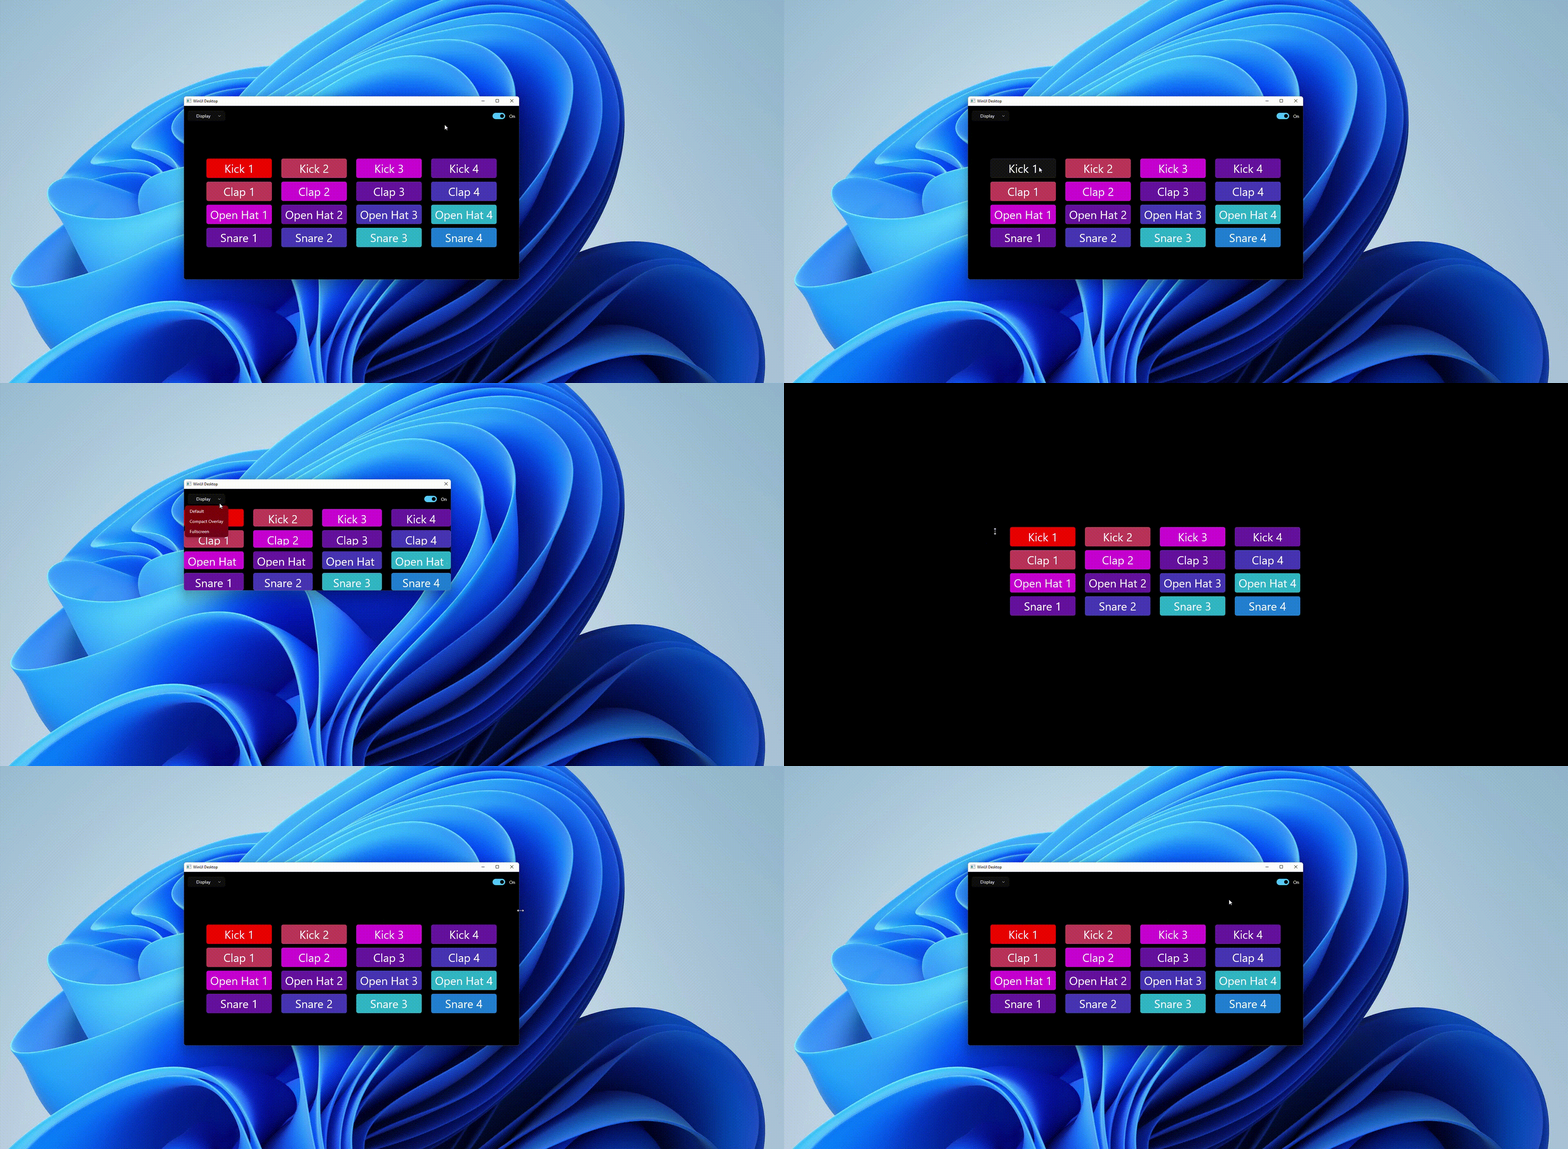
Note that in part 1 of the WinAppSDK Blog Series you implemented the visual layer of the DrumPad using WinUI 3 controls. However, if you click on any buttons, nothing happens, because we have not defined any actions, which we will do now. You will be guided to accomplish the following in this post:- Play a sound when a drum pad button is clicked
- Switch into dark mode when the toggle switch is turned on
- Go into a specific windowing mode when a presenter mode is selected
Play a sound when a drum pad button is clicked
- Download sound clips to your project’s Assets folder
- Navigate to Solution Explorer, under Dependencies, right-click on Packages, select Manage NuGet Packages
- Select the Browse tab, search System.Windows.Extensions and install it
using System.Media;
4. Create a call-back function that plays a sound in class MainWindow : Window : MainAppWindow.xaml.cs:
private void pad_clicked(object sender, RoutedEventArgs e)
{
// get the full path to your app’s folder where it is installed
var installedPath = Windows.ApplicationModel.Package.Current.InstalledLocation.Path;
// join path above with the sub-paths in your Assets folder and the specific sound file
var soundFile = Path.Join(installedPath, "Assets", "rim.wav");
SoundPlayer player = new System.Media.SoundPlayer(soundFile);
player.Play();
}
5. link the call-back function above to a button via the Click parameter: MainWindow.xaml:
Repeat step 4 and 5 to attach another sound clip to a different button until all the buttons have a click action! For your reference, check out my MainWindow.xaml.cs and MainWindow.xaml on GitHub.
Implement dark mode
The dark mode is an app appearance where the content is laid out on a dark background. It gives the app a different aesthetic look and can improve readability, especially in a low-light environment.- Define SolidColorBrush under the light and dark themes below the comment <!– Other app resources here –>:
2. Indicate which theme to use via the Background parameter (here we specified it on the outermost Grid in MainWindow.xaml): MainWindow.xaml:
3. Define the action for ToggleSwitch in class MainWindow : Window : MainWinow.xaml.cs:
private void ToggleSwitch_Toggled(object sender, RoutedEventArgs e)
{
ToggleSwitch toggleSwitch = sender as ToggleSwitch;
if (toggleSwitch.IsOn) {
((FrameworkElement)this.Content).RequestedTheme = ElementTheme.Dark;
}
else {
((FrameworkElement)this.Content).RequestedTheme = ElementTheme.Light;
}
}
4. Link the call-back function above to the ToggleSwitch control: MainWindow.xaml:
NOTE: You can save the state of the theme resource and persist the option the user chose at the next time of app startup with four easy steps. Follow this blog post to implement this functionality.
Managing window display
Using the Windowing features in WinAppSDK provides a lot of flexibility and customization to your app experience. One of these customization features is the ability to change the Presenter mode of your window. There are 3 presenters you can use: Compact Overlay, Fullscreen, and Overlapped mode, with overlapped being the default presenter.- Add the following namespaces:
using WinRT;
// Needed for WindowId
using Microsoft.UI;
// Needed for AppWindow
using Microsoft.UI.Windowing;
// Needed for XAML hwnd interop
using WinRT.Interop;
2. Declare the following variable in class MainWindow : Window : MainWindow.xaml.cs:
AppWindow m_appWindow;
3. Define a helper method GetAppWindowForCurrentWindow() : MainWindow.xaml.cs:
private AppWindow GetAppWindowForCurrentWindow()
{
IntPtr hWnd = WinRT.Interop.WindowNative.GetWindowHandle(this);
WindowId myWndId = Microsoft.UI.Win32Interop.GetWindowIdFromWindow(hWnd);
return AppWindow.GetFromWindowId(myWndId);
}
NOTE: The preceding code gets the window Id for the hwnd and then uses that window Id to get the current AppWindow. This will create the WinAppSDK window layer that gives you access to all the window customization features of the app window. 4. Call GetAppWindowForCurrentWindow in the MainWindow() method: MainWindow.xaml.cs:
m_appWindow = GetAppWindowForCurrentWindow();
5. Set the current app window to the Compact Overlay presenter via the SetPresenter method in class MainWindow : Window : MainWindow.xaml.cs:
private void SwtichPresenter_CompOverlay(object sender, RoutedEventArgs e)
{
m_appWindow.SetPresenter(AppWindowPresenterKind.CompactOverlay);
}
6. Modify the MenuFlyouItem control to add the SwtichPresenter_CompOverlay function using the Click parameter: MainWindow.xaml:
NOTE: Repeat the steps 5 and 6 to implement the FullScreen and Overlapped (the default) presenters. The only change needed is to modify step 5 to use AppWindowPresenterKind.Overlapped or AppWindowPresenterKind.FullScreen.
Result

Moving forward
Next, we will keep evolving the app with single-instancing.Continue reading...