Starting in Terminal 1.15 Preview, the Windows Terminal has started experimentally supporting some new “shell integration” features that make the command line easier to use. In earlier releases, we enabled the shell to inform the Terminal about the current working directory. Now, we have added support for more sequences that allow your shell to semantically describe parts of the terminal output as a “prompt,” a “command,” or “output.” The shell can also indicate whether a command has succeeded or failed.
This is a guide to some of the shell integration features we’ve rolled out as of Terminal v1.18. We’re planning on building even more features on top of these in the future, so we’d love to get some additional feedback on how folks using them.
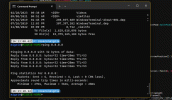
Here’s a number of features that this makes possible today:
Shell integration works by having the shell (or any command line application) write special “escape sequences” to the Terminal. These escape sequences aren’t printed to the Terminal – instead, they provide bits of metadata the terminal can use to know more about what’s going on in the application. By sticking these sequences into your shell’s prompt, you can have the shell continuously provide info to the terminal that only the shell knows.
For the following sequences:
The relevant supported shell integration sequences as of Terminal v1.18 are:
Supporting these features requires cooperation between your shell and the Terminal. You’ll need to both enable settings in the Terminal to use these new features, as well as modify your shell’s prompt.
To enable these features in the Terminal, you’ll want to add the following to your settings:
How you enable these marks in your shell varies from shell to shell. Below are tutorials for CMD and PowerShell.
PowerShell (
If you’ve never changed your PowerShell prompt before, you should check out about_Prompts first.
We’ll need to edit your
Add the following to your PowerShell profile:
Command Prompt sources it’s prompt from the
You can change the prompt for the current CMD.exe instance by running:
Or, you can set the variable from the command-line for all future sessions:
These examples assume your current
This is what shell integration is capable of today – and we’ve got lots more we want to do in the future. If you want to stay up to date on the latest state of the work in this area, I’d follow:
And if you have any other feedback, please feel free to head over to our repo at github.com/microsoft/terminal
The post Shell integration in the Windows Terminal appeared first on Windows Command Line.
Continue reading...
This is a guide to some of the shell integration features we’ve rolled out as of Terminal v1.18. We’re planning on building even more features on top of these in the future, so we’d love to get some additional feedback on how folks using them.
Note: Notably, “marks” are still experimental, and are only enabled for Preview builds of the Terminal. They’ll break pretty regularly if you resize the Terminal frequently and will likely work unexpectedly when clearing the screen withclear.
Here’s a number of features that this makes possible today:
Open new tabs in the same working directory

Show marks for each command in the scrollbar

Automatically jump between commands

Select the entire output of a command


How does this work?
Shell integration works by having the shell (or any command line application) write special “escape sequences” to the Terminal. These escape sequences aren’t printed to the Terminal – instead, they provide bits of metadata the terminal can use to know more about what’s going on in the application. By sticking these sequences into your shell’s prompt, you can have the shell continuously provide info to the terminal that only the shell knows.
For the following sequences:
OSCis the string"\x1b]"– an escape character, followed by]STis the “string terminator”, and can be either\x1b\(an ESC character, followed by\) or\x7(the BEL character)- Spaces are merely illustrative.
- Strings in
<>are parameters that should be replaced by some other value.
The relevant supported shell integration sequences as of Terminal v1.18 are:
OSC 9 ; 9 ; <CWD> ST(“ConEmu Set working directory“) – Tell the Terminal what the current working directory is.CWDneeds to be a Windows filesystem path for this to work. If using this in WSL or cygwin, you’ll need to usewslpathorcygpath.OSC 133 ; A ST(“FTCS_PROMPT“) – The start of a prompt.OSC 133 ; B ST(“FTCS_COMMAND_START“) – The start of a command-line (READ: the end of the prompt).OSC 133 ; C ST(“FTCS_COMMAND_EXECUTED“) – The start of the command output / the end of the command-line.OSC 133 ; D ; <ExitCode> ST(“FTCS_COMMAND_FINISHED“) – the end of a command.ExitCodeIfExitCodeis provided, then the Terminal will treat0as “success” and anything else as an error. If omitted, the terminal will just leave the mark the default color.
How to enable shell integration marks
Supporting these features requires cooperation between your shell and the Terminal. You’ll need to both enable settings in the Terminal to use these new features, as well as modify your shell’s prompt.
To enable these features in the Terminal, you’ll want to add the following to your settings:
Code:
"profiles":
{
    "defaults":
    {
        // Marks in general
        "experimental.showMarksOnScrollbar": true,

        // Needed for both pwsh and CMD shell integration
        "experimental.autoMarkPrompts": true,

        // Add support for a right-click context menu
        // You can also just bind the `showContextMenu` action
        "experimental.rightClickContextMenu": true,
    },
}
"actions":
[
    { "keys": "ctrl+up",   "command": { "action": "scrollToMark", "direction": "previous" }, },
    { "keys": "ctrl+down", "command": { "action": "scrollToMark", "direction": "next" }, },

    // Add the ability to select a whole command (or its output)
    { "keys": "ctrl+shift+up",   "command": { "action": "selectOutput", "direction": "prev" }, },
    { "keys": "ctrl+shift+down", "command": { "action": "selectOutput", "direction": "next" }, },

    { "keys": "ctrl+alt+shift+up",   "command": { "action": "selectCommand", "direction": "prev" }, },
    { "keys": "ctrl+alt+shift+down", "command": { "action": "selectCommand", "direction": "next" }, },
]
How you enable these marks in your shell varies from shell to shell. Below are tutorials for CMD and PowerShell.
PowerShell (pwsh.exe)
If you’ve never changed your PowerShell prompt before, you should check out about_Prompts first.
We’ll need to edit your
prompt to make sure we tell the Terminal about the CWD, and mark up the prompt with the appropriate marks. PowerShell also lets us include the error code from the previous command in the 133;D sequence, which will let the terminal automatically colorize the mark based if the command succeeded or failed.Add the following to your PowerShell profile:
Code:
$Global:__LastHistoryId = -1

function Global:__Terminal-Get-LastExitCode {
  if ($? -eq $True) {
    return 0
  }
  if ("$LastExitCode" -ne "") { return $LastExitCode }
  return -1
}

function prompt {

  # First, emit a mark for the _end_ of the previous command.

  $gle = $(__Terminal-Get-LastExitCode);
  $LastHistoryEntry = $(Get-History -Count 1)
  # Skip finishing the command if the first command has not yet started
  if ($Global:__LastHistoryId -ne -1) {
    if ($LastHistoryEntry.Id -eq $Global:__LastHistoryId) {
      # Don't provide a command line or exit code if there was no history entry (eg. ctrl+c, enter on no command)
      $out += "`e]133;D`a"
    } else {
      $out += "`e]133;D;$gle`a"
    }
  }


  $loc = $($executionContext.SessionState.Path.CurrentLocation);

  # Prompt started
  $out += "`e]133;A`a";

  # CWD
  $out += "`e]9;9;`"$loc`"`a";

  # (your prompt here)
  $out += "PWSH $loc$('>' * ($nestedPromptLevel + 1)) ";

  # Prompt ended, Command started
  $out += "`e]133;B`a";

  $Global:__LastHistoryId = $LastHistoryEntry.Id

  return $out
}
Command Prompt
Command Prompt sources it’s prompt from the
PROMPT environment variable. CMD.exe reads $e as a the ESC character. Unfortunately, CMD.exe doesn’t have a way to get the return code of the previous command in the prompt, so we’re not able to provide success / error information in CMD prompts.You can change the prompt for the current CMD.exe instance by running:
Code:
PROMPT $e]133;D$e\$e]133;A$e\$e]9;9;$P$e\$P$G$e]133;B$e\Or, you can set the variable from the command-line for all future sessions:
Code:
setx PROMPT $e]133;D$e\$e]133;A$e\$e]9;9;$P$e\$P$G$e]133;B$e\These examples assume your current
PROMPT is just $P$G. You can instead choose to wrap your current prompt with something like:
Code:
PROMPT $e]133;D$e\$e]133;A$e\$e]9;9;$P$e\%PROMPT%$e]133;B$e\Note: Don’t see your favorite shell here? If you figure it out, feel free to to contribute a solution for your preferred shell! That docs page will remain an up-to-date version of this post, as we add more shell integration features to future releases.
Conclusion
This is what shell integration is capable of today – and we’ve got lots more we want to do in the future. If you want to stay up to date on the latest state of the work in this area, I’d follow:
And if you have any other feedback, please feel free to head over to our repo at github.com/microsoft/terminal
The post Shell integration in the Windows Terminal appeared first on Windows Command Line.
Continue reading...